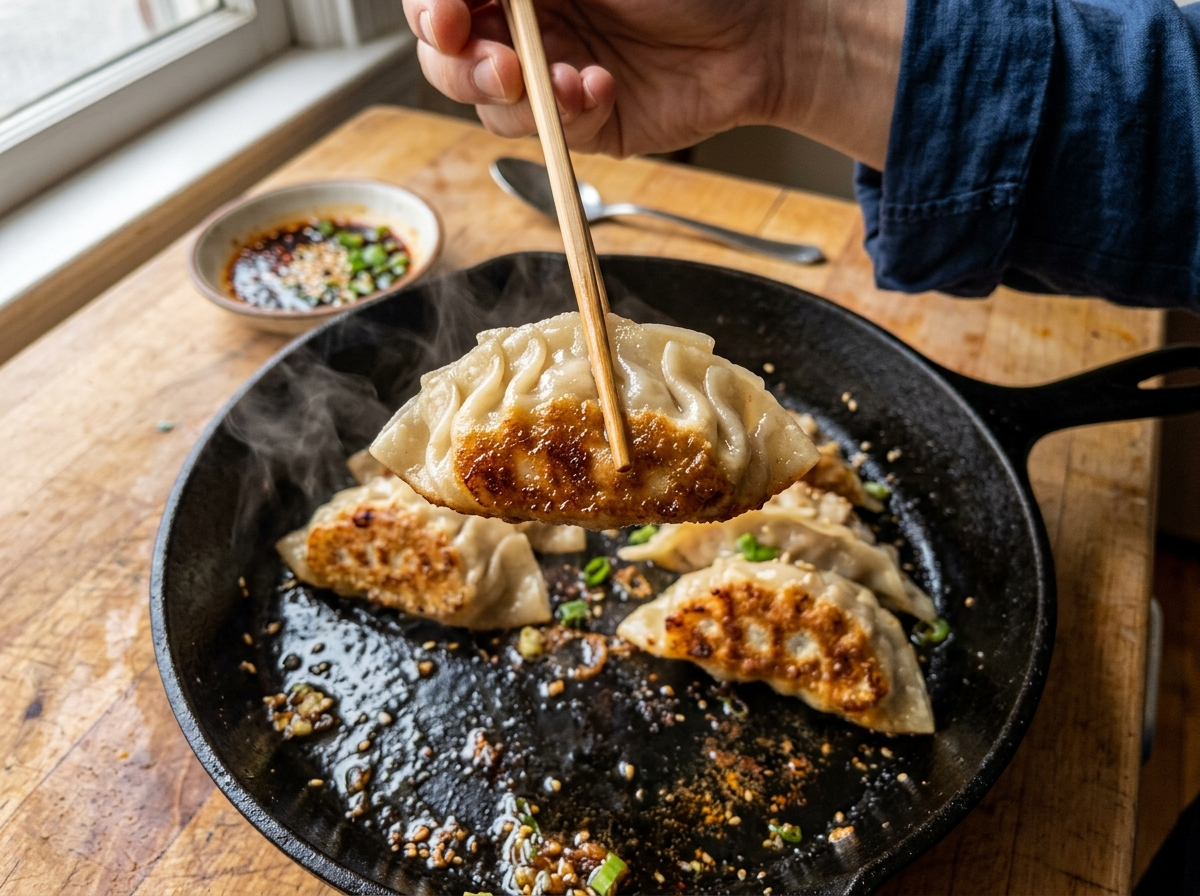
A single potsticker holds a beautiful contradiction. The bottom should shatter like thin glass when you bite into it, but the top should stay soft, pillowy, almost steamed. Getting both textures on one small dumpling isn’t luck. It’s temperature control and technique working together.
Most people either end up with soggy, pale potstickers that taste like boiled dough or burnt husks with raw filling inside. The difference between those failures and restaurant-quality results? It’s about 30 degrees on your stove dial and a two-minute splash of water. That’s really it.
If you’ve ever stood over a skillet wondering why your potstickers aren’t browning, or why they keep sticking (ironic, given the name), this guide breaks down exactly what’s happening in that pan and how to fix it. No vague advice. Just temperatures, times, and techniques that actually work.
What Makes a Potsticker Different from Other Dumplings?
Before we talk temperatures, it helps to understand what you’re actually cooking. A potsticker — called guotie (锅贴) in Mandarin — isn’t just a dumpling that happens to stick to the pot. The name describes a specific cooking method that originated in northern China, possibly during the Song Dynasty (960–1279 CE).
The technique is a hybrid. You pan-fry, then steam, then pan-fry again. Three stages, one pan. That’s what separates a potsticker from a boiled jiaozi or a deep-fried wonton. You’re after a crispy golden bottom, a tender steamed top, and a juicy filling that’s cooked through without drying out.
The wrapper plays a role too. Potsticker wrappers use hot water dough (sometimes called dead dough), which makes them softer and more pliable than the cold-water dough used for boiled dumplings. This matters because the wrapper needs to survive frying without cracking and steaming without falling apart.
If you enjoy dumplings and want to explore another great variation, Korean kimchi dumplings (mandu) follow a similar cooking philosophy but bring a spicy, fermented kick that’s addictive.
The Three-Stage Cooking Method Explained
Here’s the thing most recipes gloss over: cooking potstickers isn’t one step. It’s three distinct stages happening in sequence, and each stage needs a different temperature and approach.
Stage 1 — The Initial Sear
You start with a cold or lightly oiled pan and bring it to medium-high heat (around 350°F to 375°F / 175°C to 190°C). Once a drop of water sizzles and evaporates within two seconds, the pan is ready.
Add about one tablespoon of a high smoke-point oil — vegetable, canola, or avocado oil all work well. Place your potstickers flat-side down in the pan. Don’t move them. Don’t shake the pan. Don’t peek underneath every ten seconds.
Let them sear for 2 to 3 minutes until the bottoms turn golden brown. You’ll hear a steady sizzle — that’s moisture leaving the wrapper and the Maillard reaction building that crust. If the sizzle is aggressive and popping, your heat is too high. If you barely hear anything, it’s too low.
Pro Tip: Arrange potstickers in a circle or tight rows. They cook more evenly, and the presentation looks great when you flip the whole batch onto a plate.
Stage 2 — The Steam
This is where most people panic, and it’s actually the easiest part. Once your bottoms are golden, add about ¼ cup of water (roughly 60 ml) to the pan and immediately cover it with a tight-fitting lid.
The water hits the hot pan and instantly creates steam. That trapped steam cooks the filling and the top of the wrapper simultaneously. You need medium heat (around 300°F to 325°F / 150°C to 165°C) for this stage.
Let them steam for 3 to 4 minutes if using fresh potstickers, or 5 to 7 minutes for frozen ones. You’ll know the steaming stage is done when most of the water has evaporated. The sizzling sound returns — that’s your cue to remove the lid.
A word about water quantity: too much water and your wrappers turn gummy. Too little and the filling stays raw in the center. For a standard 10 to 12-inch skillet with about 12 potstickers, a quarter cup is the sweet spot.
Stage 3 — The Final Crisp
Once the lid comes off, you want to let the remaining moisture cook away. Keep the heat at medium and let the potstickers sit for another 1 to 2 minutes. This re-crisps the bottom and drives off any residual sogginess.
Some cooks add a tiny drizzle of sesame oil at this stage. It doesn’t just add flavor — the fresh oil helps create an extra layer of crunch on the already-browned bottom. About half a teaspoon swirled around the edges of the pan is enough.
Temperature Matters: A Quick Reference
Let’s put the numbers together so you can reference them easily:
For the initial sear: 350°F–375°F (medium-high heat), 2–3 minutes uncovered.
For the steam: 300°F–325°F (medium heat), 3–4 minutes covered with water (5–7 minutes for frozen).
For the final crisp: 300°F–325°F (medium heat), 1–2 minutes uncovered until the sizzle returns.
Internal temperature of the filling: The USDA recommends 165°F (74°C) for any potsticker filling that contains poultry. For pork-based fillings, 160°F (71°C) is the standard. Veggie fillings don’t have a safety threshold, but you still want them hot throughout — around 140°F to 150°F (60°C to 65°C) for best texture and flavor.
If you’ve ever worked with internal temperatures for other proteins, the logic is the same. For example, knowing how to tell when shrimp is cooked uses a similar temperature awareness — you’re watching for visual cues backed by actual numbers.
Choosing the Right Pan (It Matters More Than You Think)
Your pan selection directly affects how well your potstickers cook. Different materials conduct heat differently, and that changes everything from browning to sticking.
Cast Iron Skillet
Cast iron holds heat beautifully. Once it’s hot, it stays hot even when you add cold dumplings. That thermal mass gives you a deep, even sear. The downside? Cast iron has hot spots, so you need to preheat it longer (about 3 to 4 minutes over medium heat) and rotate the pan occasionally.
A well-seasoned cast iron pan is practically nonstick for potstickers. If your cast iron is newer or the seasoning is patchy, use a bit more oil to compensate.
Carbon Steel Wok or Flat Pan
This is the traditional choice in Chinese kitchens. Carbon steel heats up fast, responds quickly to temperature changes, and develops a natural nonstick patina over time. A flat-bottomed carbon steel pan is ideal if you have one.
Nonstick Skillet
If you’re new to making potstickers, a good nonstick skillet removes the biggest frustration: dumplings tearing when you try to serve them. You’ll use less oil, and cleanup is simple. The trade-off is that nonstick pans don’t get quite as hot as cast iron, so your crust might be lighter in color. Still tasty, just a slightly different result.
Stainless Steel
It works, but it’s tricky. Stainless steel needs more oil, proper preheating, and a confident hand. Potstickers stick to stainless steel like they were made for it (not in a good way) unless the pan is genuinely hot enough and well-oiled. I’d only suggest it if stainless is all you have.
Pro Tip: Whatever pan you use, make sure it has a lid that fits snugly. Loose lids let steam escape, and that steam is doing critical work during stage two.
Fresh vs. Frozen: Temperature Adjustments You Need to Know
Fresh and frozen potstickers don’t cook the same way, and adjusting your technique by just a couple of minutes makes a real difference.
Fresh (Homemade or Refrigerated)
Fresh potstickers have thinner, more delicate wrappers and fillings that are already at or near room temperature. They sear faster, steam faster, and overcook faster. Stick to the standard times: 2–3 minutes for the sear, 3–4 minutes for the steam.
Be gentle when placing them in the pan. Fresh wrappers tear easily, especially at the pleated seams.
Frozen (Store-Bought or Pre-Frozen Homemade)
Frozen potstickers need more steam time because the filling is starting from a much lower temperature. You’re looking at 5 to 7 minutes covered, sometimes even 8 minutes for large, densely packed dumplings.
One critical rule: don’t thaw frozen potstickers before cooking. They go straight from the freezer to the hot pan. Thawing makes the wrappers soggy and prone to sticking to each other, and the texture after cooking is never as good.
You might also need a splash more water — about ⅓ cup instead of ¼ cup — to generate enough steam to cook through the frozen filling.
If you regularly store prepped food in your freezer, you probably already know how much storage temperature matters. The same logic applies to something like keeping cooked rice in the fridge — temperature and timing determine whether your food comes out great or disappointing.
The Water-Flour Slurry Trick for a Lace Skirt Crust
Here’s a technique that’s been blowing up online, and for good reason. Instead of adding plain water for the steaming stage, you mix about 2 tablespoons of flour (or cornstarch) into your ¼ cup of water and pour that slurry into the pan.
What happens? As the water evaporates, the starch cooks into a thin, crispy, lace-like sheet that connects all the potstickers at the base. When you flip the whole batch onto a plate, you get this beautiful lattice of crunch holding everything together. It looks stunning, and the texture contrast is incredible.
The temperature stays the same — medium heat, covered, until the water evaporates. But watch the final crisp stage more carefully. That starch layer can go from golden to burnt quickly. Keep it at medium or even medium-low heat for the last minute or two, and listen for the sizzle to settle from aggressive to gentle.
Cornstarch creates a lighter, more delicate lace. All-purpose flour makes it slightly thicker and chewier. Both work. Try both and decide what you prefer.
Oven-Baked Potstickers: A Hands-Off Alternative
Not everyone wants to stand over a stove managing three cooking stages. Baking potstickers in an oven is completely legitimate, and it gives you a surprisingly good result — especially for large batches.
Preheat your oven to 425°F (220°C). Line a sheet pan with parchment paper and brush it lightly with oil. Place your potstickers flat-side down on the oiled parchment, then brush or spray the tops with a thin layer of oil.
Bake for 12 to 15 minutes for fresh, or 15 to 18 minutes for frozen, flipping them halfway through. The bottoms won’t get as deeply caramelized as pan-fried potstickers, but you’ll get an all-around golden crispness that’s very satisfying.
For extra browning, broil for the last 1 to 2 minutes on high. Keep your eyes on them — broilers work fast, and burnt potstickers aren’t salvageable.
Oven baking works especially well when you’re cooking for a crowd and need 30 or 40 potstickers ready at the same time. You can’t fit that many in a single skillet.
Air Fryer Potstickers: Quick and Crispy
Air fryers run hotter and faster than conventional ovens, and they do a remarkable job with potstickers. Set your air fryer to 375°F to 380°F (190°C to 193°C).
Spray the basket with cooking spray or brush with oil. Place potstickers in a single layer — don’t stack them, or they’ll steam each other instead of crisping. Cook for 8 to 10 minutes, shaking the basket or flipping them at the halfway mark.
Fresh potstickers lean toward 8 minutes. Frozen ones need the full 10, sometimes 12 if they’re thick.
The air fryer gives you crispy results all over, not just on the bottom. It’s a different texture than the traditional pan-fried version — more like a baked spring roll than a classic guotie. Still delicious, just different.
Quick Fact: Air fryers circulate hot air at high speed, which is why they crisp food so effectively. The rapid convection mimics deep frying without submerging anything in oil. For potstickers, that means you can skip the oil entirely if you want — though a light spray definitely helps with browning.
Deep Frying Potstickers: When You Want Maximum Crunch
Traditional? No. Delicious? Absolutely. Deep-frying potstickers turns them into something closer to a Chinese fried dumpling (zha jiao), with a shattering crust all the way around.
Heat your oil to 350°F (175°C). Use a neutral oil with a high smoke point. Lower the potstickers into the oil carefully — they’ll sputter and pop because of the moisture in the filling and wrapper.
Fry for 3 to 4 minutes, turning them once, until they’re deep golden all over. Drain on a wire rack (not paper towels — wire racks keep the bottom from getting soggy).
The internal filling temperature should still hit 160°F for pork or 165°F for chicken. Because the oil cooks from all sides simultaneously, the filling usually reaches safe temperatures quickly.
Deep-fried potstickers pair beautifully with a tangy dipping sauce — soy sauce, rice vinegar, a pinch of sugar, and sliced scallions is the classic. If you’re into bolder flavors, a bit of ssam sauce brings a sweet-spicy Korean element that works surprisingly well.
Getting the Filling Right: Temperature During Prep
Let’s zoom out from cooking and talk about prep, because your filling’s temperature before it ever hits the pan affects the final result.
Keep your meat filling cold while you’re working with it. Around 35°F to 40°F (2°C to 4°C) is ideal. Cold filling is easier to handle, holds together better during wrapping, and stays juicy after cooking. Warm filling turns greasy, loses structure, and tends to leak through the wrapper seams.
If you’re making pork filling (the most traditional option), mix your ground pork with finely chopped napa cabbage, ginger, garlic, soy sauce, sesame oil, and a splash of Chinese cooking wine. The wine tenderizes the meat and adds a subtle depth that’s hard to replicate with any substitute.
After mixing, refrigerate the filling for at least 30 minutes before wrapping. This rest lets the flavors meld and the fat firm up, making the filling much easier to scoop and fold.
Did You Know? Traditional potsticker filling in northern China often includes Chinese chives (jiu cai) instead of regular scallions. The flavor is stronger and more garlicky, and the aroma when those dumplings hit the hot pan is unforgettable.
Troubleshooting: Why Your Potstickers Aren’t Working
Even with good technique, things go wrong. Here are the most common problems and exactly how to fix them.
They’re sticking to the pan (and tearing)
Your pan isn’t hot enough, or there isn’t enough oil. The sear needs to happen quickly so the bottom of the wrapper dries and releases naturally. If the pan is too cool, the wrapper absorbs the oil and bonds to the surface. Preheat longer and add a full tablespoon of oil.
The bottoms are burnt but the filling is raw
Your heat is too high during the steaming stage. After adding water and covering the pan, drop the heat to medium. The steam does the real cooking work during this stage — you don’t need high heat. Also check that your lid fits tightly. If steam is escaping, the filling doesn’t get enough heat.
The wrappers are gummy and soft
Too much water during steaming, or the lid stayed on too long after the water evaporated. Measure your water. A quarter cup is enough for a 10–12-inch pan. Pull the lid off as soon as you hear the sizzle return.
They fell apart during cooking
The wrappers were either too thin, too dry, or the seams weren’t sealed properly. Dab a bit of water on the edges before pinching them closed. Make sure there’s no filling touching the seam — fat and moisture prevent the dough from sticking to itself.
The Best Dipping Sauce Temperatures
This is a small detail that most people skip, but it genuinely makes a difference. Serve your dipping sauce at room temperature — around 65°F to 72°F (18°C to 22°C). Cold sauce straight from the fridge numbs your taste buds slightly and mutes the flavor. Warm sauce is just weird with dumplings.
A simple, perfect potsticker dipping sauce: 3 tablespoons soy sauce, 1 tablespoon rice vinegar, 1 teaspoon sesame oil, a pinch of sugar, and chili flakes or chili oil to taste. Slice a few scallion rings on top. That’s it. It takes thirty seconds and tastes better than anything from a bottle.
Reheating Leftover Potstickers the Right Way
Cold leftover potstickers are sad. Microwaved leftover potstickers are sadder. Here’s what to do instead.
Get a skillet back to medium heat with a thin layer of oil. Place the potstickers bottom-down and let them sear for 1 to 2 minutes to re-crisp the base. Add just 2 tablespoons of water, cover, and steam for 2 minutes. Remove the lid and let the remaining moisture evaporate.
You’re essentially repeating the original cooking method on a smaller, faster scale. The result is potstickers that taste nearly as good as fresh. The wrapper won’t be quite as delicate — reheated dough is always slightly chewier — but the crunch on the bottom will be back.
For oven reheating, 350°F (175°C) for 8 to 10 minutes on a parchment-lined tray works decently. Not as crispy as the skillet method, but easy if you’re reheating a larger batch.
This kind of careful reheating approach mirrors what you’d do with other delicate proteins. If you’ve ever reheated leftover fish, you know how much technique matters — the same way cooked salmon stored in the fridge needs gentle treatment to stay good.
FAQ
What temperature should potstickers be cooked at on the stove?
Start your skillet at medium-high heat (about 350°F–375°F) for the initial sear, then drop to medium heat (300°F–325°F) during the steaming and final crisping stages. You won’t typically measure the exact surface temperature at home, but if your oil shimmers without smoking and a drop of water sizzles on contact, you’re in the right range.
Can you cook frozen potstickers without thawing them first?
Yes, and you should. Cooking frozen potstickers directly from the freezer gives the best results. Thawing them first makes the wrappers soggy and causes them to stick together. Just add an extra minute or two of steam time (5–7 minutes total instead of 3–4) and slightly more water to account for the colder starting temperature.
How do you know when potstickers are fully cooked inside?
The most reliable way is an instant-read thermometer. Pork filling should reach 160°F (71°C), and chicken filling should hit 165°F (74°C). Visual cues help too: the wrapper should be translucent on the steamed portions, and the filling should feel firm (not squishy) when you press the top gently with a finger or chopstick.
Why do my potstickers always stick and tear?
Two likely causes: the pan isn’t hot enough before you add the dumplings, or there isn’t enough oil. Make sure your oil is shimmering before placing the potstickers down, and don’t move them during the sear stage. The golden crust that forms during searing is what releases them naturally from the pan surface.
What’s the best oil for cooking potstickers?
Use a neutral oil with a high smoke point. Vegetable oil, canola oil, and avocado oil are all excellent choices. Save the sesame oil for finishing — it has a low smoke point and burns easily at frying temperatures. A tiny drizzle of sesame oil during the last 30 seconds of cooking adds incredible fragrance without burning.
Your Next Batch Will Be Better
Potstickers reward you for paying attention. Not perfection — just attention. Watch the heat, listen to the sizzle, and respect the three stages: sear, steam, crisp. That’s the whole formula.
Start with store-bought frozen potstickers if you’re practicing the technique. Once you’re confident with the cooking method, try making your own from scratch. The jump from frozen to homemade is huge in terms of flavor, and wrapping them is genuinely fun once you get into a rhythm.
And here’s the best part: even your “failed” potstickers will probably taste great. A slightly over-browned bottom or a wrapper that tears a little still delivers a delicious, satisfying bite. So heat up that skillet, and if you want to build a full spread, a simple teriyaki chicken bowl alongside your potstickers makes for a weeknight dinner that feels way more special than the effort it takes.