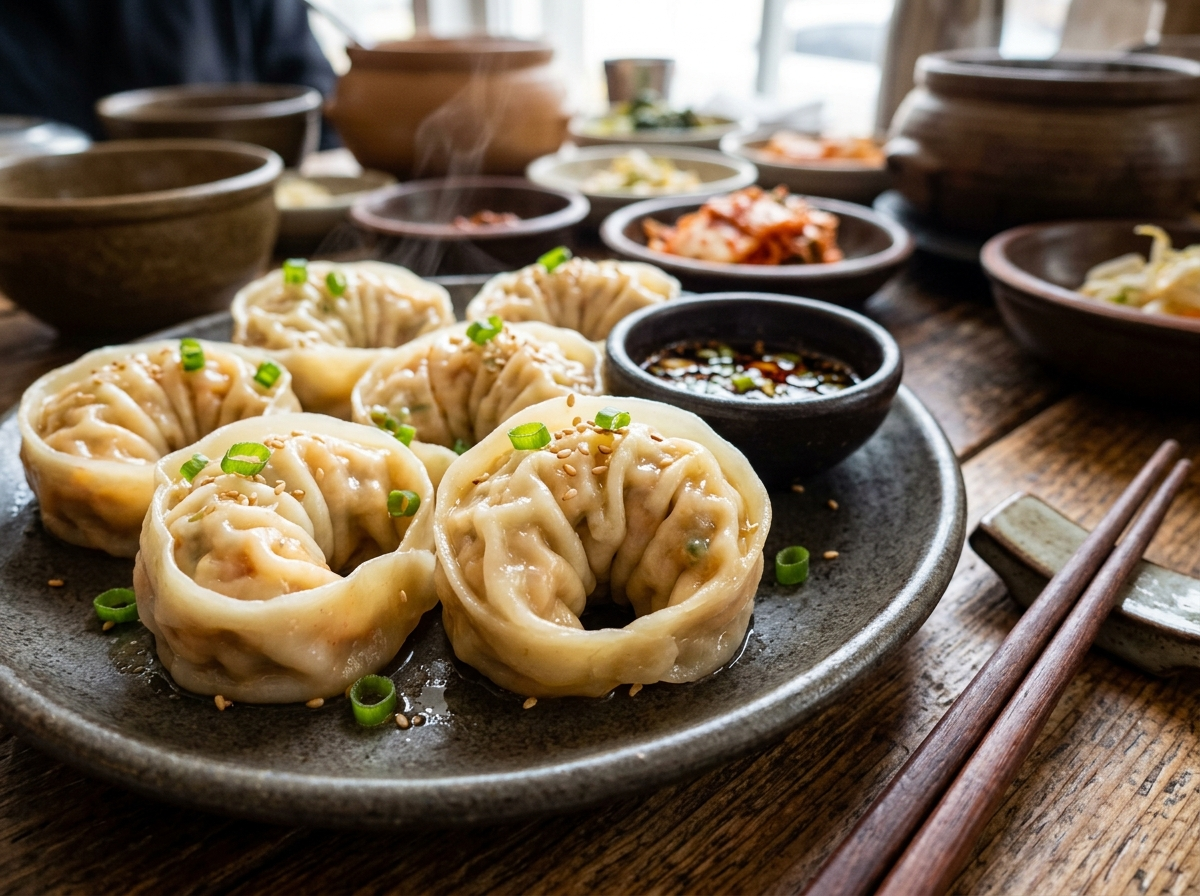
Over 2 billion dumplings get consumed every single Lunar New Year in Korea alone. And among all the varieties, kimchi mandu holds a special place on the table — the kind of dish that grandmothers argue about, street vendors perfect over decades, and home cooks proudly bring to family gatherings.
If you’ve ever bitten into a perfectly made kimchi mandu, you know exactly what makes it different from other dumplings. There’s that tangy, fermented punch from the kimchi, balanced by savory pork and the soft chew of a thin wrapper. It hits flavor notes that regular dumplings just can’t reach.
But here’s the thing — most people assume making kimchi mandu at home is complicated. It really isn’t. You don’t need fancy equipment or hard-to-find ingredients. What you do need is a bit of know-how about the filling, the folding, and the cooking method. That’s exactly what we’re going to cover here, step by step, without overcomplicating anything.
Whether you’re a total beginner or someone who’s made dumplings before but wants to nail the Korean version, this guide is for you.
What Exactly Is Mandu?
Mandu (만두) is the Korean word for dumplings. The concept traveled to Korea from China centuries ago, likely during the Goryeo Dynasty around the 14th century. Over time, Koreans made it their own — different fillings, different shapes, different cooking styles.
You’ll find mandu all across Korean cuisine. They show up in soups (mandu-guk), as steamed appetizers, pan-fried as a snack, or deep-fried for extra crunch. The fillings vary wildly too — from beef and tofu to glass noodles and vegetables.
Kimchi mandu is one of the most popular versions. It uses fermented kimchi as a core ingredient in the filling, which gives these dumplings their signature tangy kick. The fermentation adds a depth of flavor you simply can’t replicate with fresh cabbage or any other shortcut.
Think of it this way: if regular dumplings are like a well-told story, kimchi mandu is that same story with a plot twist that keeps you coming back.
Why Kimchi Makes All the Difference
You might wonder — can’t I just use fresh vegetables and add some chili paste? Sure, you can, but you’d miss the entire point.
Kimchi isn’t just spicy cabbage. It’s a living, fermented food packed with lactic acid bacteria, umami compounds, and a complex sour-spicy flavor profile that develops over days, weeks, or even months of fermentation. When you put that inside a dumpling, something special happens during cooking. The heat mellows out some of the sharpness while intensifying the savory, almost meaty quality of well-fermented kimchi.
Pro Tip: Use older, more sour kimchi for mandu — the kind that’s been sitting in your fridge for a few weeks and is maybe too sour to eat straight. That overripe kimchi is actually perfect for cooking. It has deeper flavor and less excess moisture than fresh kimchi.
This is similar to how aged ingredients transform other dishes too. If you enjoy working with bold, fermented flavors in Asian cooking, you might also appreciate how Chinese cooking wine adds depth to stir-fries and marinades — same principle of fermentation doing the heavy lifting.
Ingredients You’ll Need
Let’s keep this practical. Here’s what goes into a solid kimchi mandu filling, plus the wrappers.
For the Filling
Kimchi (about 2 cups, well-drained): This is your star ingredient. Napa cabbage kimchi works best. Squeeze out as much liquid as possible — excess moisture is the number one reason mandu fillings turn soggy. Chop it finely after draining.
Ground pork (about 200g / roughly half a pound): Pork gives the filling richness and body. You want something with a bit of fat — don’t go for the leanest option. Fat equals flavor and juiciness. If you don’t eat pork, ground chicken thigh or even crumbled firm tofu works as a substitute.
Firm tofu (half a block, about 150g): Wrap it in a clean towel and squeeze hard to remove water. Tofu adds a softer texture that balances the chewier pork and kimchi. Crumble it finely.
Glass noodles (a small bundle, about 50g dry): Also called dangmyeon or sweet potato noodles. Boil them, drain them, and chop them into short pieces. They add a pleasant chewy texture.
Garlic (3-4 cloves, minced), green onions (2-3 stalks, finely sliced), sesame oil (1 tablespoon), soy sauce (1 tablespoon), salt and black pepper to taste. These round out the seasoning.
One egg: Acts as a binder to hold everything together.
For the Wrappers
You have two options here. Store-bought round dumpling wrappers are perfectly fine and save you a lot of time. Look for them in the refrigerated section of any Asian grocery store. If you’re near an H-Mart or a similar Korean market, you’ll find mandu-specific wrappers that tend to be slightly thicker and larger than Chinese dumpling wrappers.
If you want to make wrappers from scratch — 2 cups all-purpose flour, a pinch of salt, and about ¾ cup hot water. Knead until smooth, rest for 30 minutes, then roll out thin circles. Honestly though? Store-bought works great for your first few batches.
Making the Filling — Where Flavor Lives or Dies
This is the step that separates forgettable mandu from ones people remember. Pay attention here.
Start by prepping each ingredient separately. Your kimchi needs to be thoroughly drained. I can’t stress this enough. Put it in a fine mesh strainer and press down with the back of a spoon. Then put it on a clean kitchen towel, wrap it up, and squeeze again. You want it as dry as possible. Once drained, chop it into small pieces — roughly the size of a pea.
Your tofu goes through the same draining process. Wrap, squeeze, crumble.
Cook the glass noodles according to the package instructions (usually a quick 5-6 minute boil), rinse in cold water, drain well, and chop into roughly 2-inch pieces.
Now, combine everything in a big bowl. Add your ground pork, the drained and chopped kimchi, crumbled tofu, chopped glass noodles, minced garlic, sliced green onions, sesame oil, soy sauce, the egg, and a good pinch of salt and pepper.
Mix with your hands. Seriously — don’t use a spoon. You need to feel when the filling comes together properly. Mix until everything is evenly distributed but don’t overwork it. You’re not making a meatloaf; you want distinct textures in each bite.
Quick test: Take a tiny pinch of the filling and fry it in a small pan. Taste it. Adjust salt, soy sauce, or sesame oil as needed. This 30-second step saves you from the disappointment of bland dumplings after all that work.
Folding Kimchi Mandu — Easier Than You Think
Here’s where most people get intimidated. Don’t be. Your first few won’t look perfect, and that’s completely fine. They’ll still taste just as good.
The Basic Half-Moon
Place a wrapper on your palm. Put about a tablespoon of filling in the center — not too much, not too little. If filling squeezes out the sides when you close it, you’ve overfilled.
Dip your fingertip in water and run it along the edge of the wrapper — this is your “glue.” Fold the wrapper in half to make a half-moon shape. Press the edges firmly to seal, starting from one end and working your way to the other. Push out any air pockets as you go. Trapped air causes mandu to burst during cooking.
The Pleated Fold
If you want something that looks a bit more polished (and holds together even better), try pleating one side. Hold the half-moon shape, but instead of pressing both edges flat together, make small folds on the front side while keeping the back side smooth. About 4-5 small pleats per dumpling does the trick.
The Round “Belly Button” Shape
This is the traditional Korean mandu shape. Make a half-moon first, then bring the two pointed ends together and press them to join. It creates a round, ring-like dumpling that looks beautiful in soups.
If you’ve ever made potstickers, the technique is very similar — fold, seal, press. The shapes differ, but the muscle memory transfers perfectly.
Did you know? In Korean tradition, the shape of your mandu supposedly reflects your personality. Neat, tight folds mean you’re detail-oriented. Lumpy, generous mandu mean you have a big heart. Take that however you like.
Four Ways to Cook Kimchi Mandu
One of the best things about mandu is its versatility. The same batch of dumplings can be cooked four completely different ways, each giving you a different eating experience.
Pan-Fried (Gunmandu)
This is probably the most popular method, and for good reason. Heat a tablespoon of vegetable oil in a non-stick skillet over medium-high heat. Place your mandu in the pan with a bit of space between each one — don’t crowd them.
Let them cook untouched for about 2-3 minutes until the bottoms turn golden brown. Then add about ¼ cup of water to the pan and immediately cover with a lid. The steam will cook the tops and the filling through. After about 4-5 minutes, remove the lid and let any remaining water evaporate.
You end up with a crispy bottom and a soft, steamed top. The contrast is everything.
This approach is practically the same as making potstickers, so if you’ve done that before, you already know the drill.
Steamed (Jjin Mandu)
Line a steamer basket with parchment paper or cabbage leaves (to prevent sticking). Place mandu with space between them. Steam over boiling water for 10-12 minutes. The wrappers turn slightly translucent and the filling gets incredibly juicy because nothing escapes through a crispy bottom — all that moisture stays inside.
Deep-Fried (Twigim Mandu)
Heat oil to about 350°F (175°C). Fry mandu in batches for 3-4 minutes until golden and crispy all over. Drain on paper towels. These are outrageously crunchy and work best as an appetizer or snack. They won’t last long at a party — fair warning.
In Soup (Mandu-Guk)
Drop uncooked mandu into a simmering beef or anchovy broth. Cook for about 8-10 minutes. Add beaten egg, sliced green onions, and a sprinkle of dried seaweed. This is the classic Korean New Year dish, and it’s comfort food at its finest — warm, savory, and deeply satisfying.
The Dipping Sauce That Ties It Together
Kimchi mandu without a proper dipping sauce is like fries without ketchup — technically fine, but you’re missing out.
The classic Korean mandu dipping sauce is dead simple. Mix together equal parts soy sauce and rice vinegar (about 2 tablespoons each). Add a teaspoon of sesame oil, a pinch of red pepper flakes (gochugaru if you have it), a small pinch of sugar, and some toasted sesame seeds.
That’s it. Five ingredients, thirty seconds, and it transforms your mandu experience.
If you want something with more heat and funk, try dipping your mandu in ssam sauce — that fermented soybean and gochujang combo that Koreans use for wraps. It’s bolder and pairs surprisingly well with the tanginess of kimchi filling.
Storage and Freezing — Make a Big Batch
Here’s a practical tip that’ll save your future self a lot of time: always make more mandu than you need.
Uncooked mandu freeze beautifully. Place them on a baking sheet lined with parchment paper, making sure they don’t touch each other. Freeze for about 2 hours until solid, then transfer to a freezer bag. They’ll keep for up to 3 months.
When you’re ready to cook them, don’t thaw them. Go straight from freezer to pan, steamer, or pot. Just add an extra 2-3 minutes to whatever cooking method you’re using.
Warning: If you let frozen mandu thaw on the counter, the wrappers get soggy and sticky and everything falls apart. Cook from frozen, always.
This freezer-friendly approach is similar to how you’d handle cooked rice storage — batch prep and proper storage make weeknight meals so much easier.
Common Mistakes and How to Avoid Them
After helping dozens of friends make their first batch of mandu, I’ve seen the same mistakes come up again and again. Let me save you from them.
Wet filling is the biggest problem. If your kimchi and tofu aren’t drained properly, the filling turns into a watery mess. The wrappers get soggy, they tear during folding, and the mandu fall apart during cooking. Drain, squeeze, drain again. You’re looking for a filling that holds its shape when you scoop it — not one that pools liquid in the bowl.
Overfilling each dumpling is the second most common issue. It’s tempting to pack them full, but overstuffed mandu are nearly impossible to seal properly. They burst open during cooking, and all that beautiful filling escapes. A tablespoon of filling per standard-sized wrapper is the sweet spot.
Not sealing the edges well enough means your mandu will open up. Water is your best friend here — just a thin line of water along the edge before pressing together. And make sure there are no air pockets trapped inside. Air expands when heated, which causes popping.
Cooking on heat that’s too high when pan-frying leads to burnt bottoms and raw insides. Medium-high heat for the initial sear, then medium heat once you add water and cover. Patience pays off.
Building a Full Korean Meal Around Mandu
Mandu works as an appetizer, a side dish, or even a main course depending on how you serve it. But if you want to build a proper Korean-inspired spread, here are some natural pairings.
A bowl of steamed rice and some Korean-style bok choy on the side turns pan-fried mandu into a complete dinner. The clean, garlicky greens balance the rich, tangy dumplings perfectly.
For a bigger gathering, you could pair mandu with Korean short ribs kalbi — the sweet-smoky ribs complement the sour-spicy dumplings, and together they cover a wide range of Korean flavors that’ll impress your guests.
Or keep it simple: a bowl of mandu-guk (dumpling soup) with some kimchi and rice on the side. That’s an honest, warming meal that millions of Korean families eat regularly, especially during the colder months.
FAQ
Can I make kimchi mandu without pork?
Absolutely. You can substitute ground chicken thigh, ground turkey, or go fully vegetarian with extra crumbled tofu and finely diced mushrooms. Shiitake mushrooms work especially well because they add an umami richness that partially replaces what pork brings to the table. Just make sure your substitute isn’t too wet — drain and squeeze just like you would with the original ingredients.
How do I know when my mandu is fully cooked?
For pan-fried mandu, the filling is done when the wrapper looks translucent or slightly glassy on top and the bottom is golden brown — usually about 7-8 minutes total. For steamed mandu, 10-12 minutes of steaming is enough. The wrapper should look slightly see-through and the dumpling should feel firm but not hard when you gently press it. If you’re ever unsure, cut one open and check — the pork inside should show no pink at all.
What kind of kimchi should I use for mandu?
Use napa cabbage kimchi (baechu kimchi), which is the most common type. The riper and more sour, the better — overly fermented kimchi that’s too sour to eat raw is actually ideal for cooking. Avoid freshly made kimchi (less than a week old) because it’s too crunchy and hasn’t developed enough flavor. Also avoid radish kimchi (kkakdugi) — the texture doesn’t work well in dumpling filling.
Can I bake mandu instead of frying or steaming?
Yes, baking works. Preheat your oven to 400°F (200°C), place mandu on a parchment-lined baking sheet, brush them lightly with oil, and bake for about 15-18 minutes, flipping halfway through. They won’t get quite as crispy as pan-fried or as juicy as steamed, but it’s a good hands-off option when you’re cooking for a crowd and don’t want to stand at the stove.
How many mandu does this recipe make?
With the quantities listed above, you’ll get roughly 35-40 dumplings, depending on how generously you fill them. That feeds about 4-5 people as a main course or 8-10 people as an appetizer. Since they freeze so well, I’d recommend making the full batch even if you’re cooking for just two — you’ll thank yourself on a busy weeknight when dinner is 10 minutes away.
Your Next Move
Kimchi mandu is one of those dishes that looks impressive on a plate but is genuinely simple once you understand the basics — drain your filling, don’t overfill, seal properly, and cook at the right temperature. That’s really the whole formula.
If you’ve never worked with kimchi in cooking before, mandu is honestly one of the best places to start. The fermented tang of the kimchi does most of the flavor work for you. You’re not building complex sauces or mastering tricky techniques — you’re just wrapping good ingredients in dough and cooking them.
Make a double batch your first time. Freeze half. And the next time you’re too tired to cook from scratch, pull a dozen out of the freezer, heat up a pan, and you’ll have crispy, tangy, juicy Korean dumplings on your plate in under 15 minutes. That’s a win any day of the week.