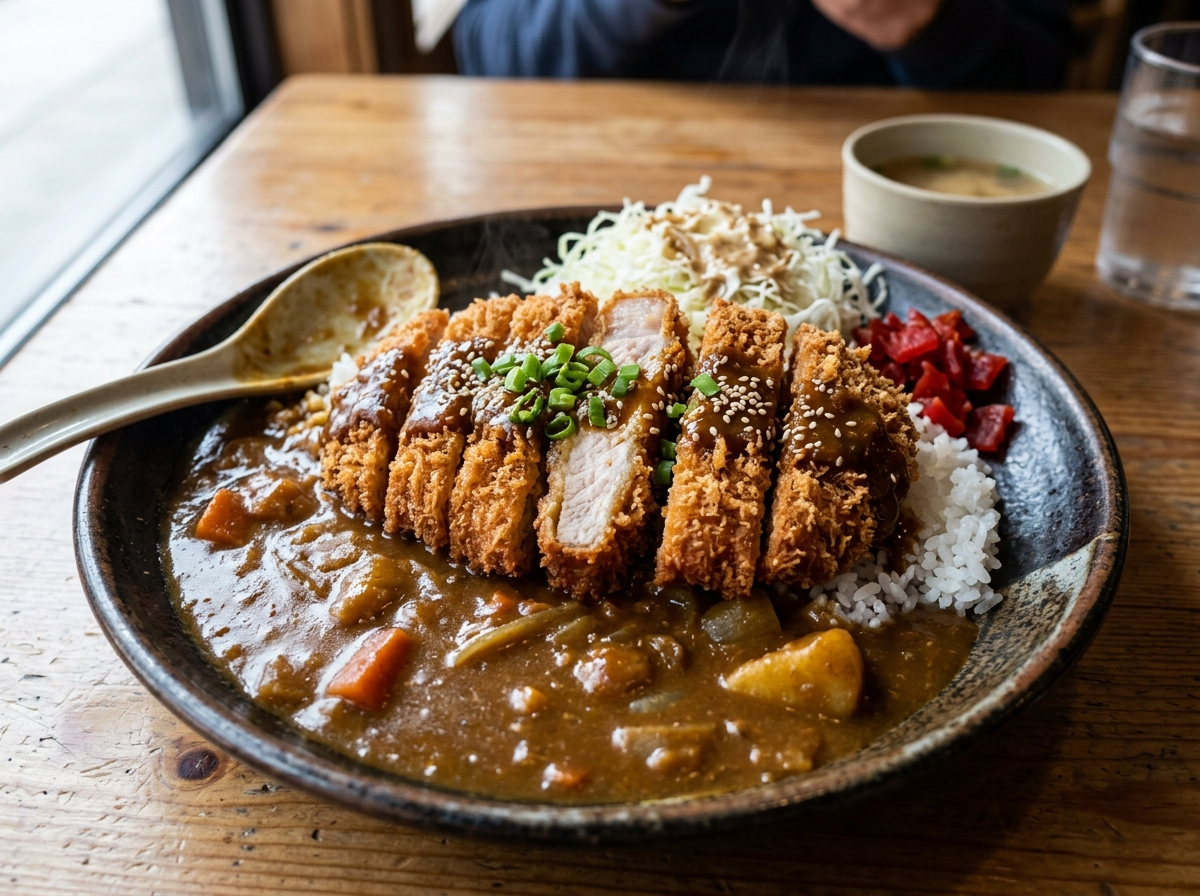
There’s a dish that quietly became one of the most ordered items in Japanese restaurants across the UK, Australia, and the US — and most people still think it’s a traditional Japanese classic. Pork katsu curry actually has roots in both Western and Japanese cooking, a beautiful cross-cultural collision that gave us something crispy, saucy, and deeply comforting. If you’ve been wanting to make it at home but felt intimidated by the breading, the curry sauce, or just getting everything right at once, you’re in the right place. This is the kind of dish that looks impressive on a plate but doesn’t demand chef-level skills. You just need to understand a few key techniques, and you’ll be making pork katsu curry that rivals your favorite restaurant’s version.
What Exactly Is Pork Katsu Curry?
Let’s break this name down because it tells you everything you need to know. “Katsu” comes from the Japanese word “katsuretsu,” which itself is borrowed from the English word “cutlet.” So pork katsu is essentially a breaded, deep-fried pork cutlet — think of it as Japan’s answer to a schnitzel or a tonkatsu.
Now pair that with Japanese curry, and you’ve got pork katsu curry. The curry here isn’t like Indian or Thai curry. Japanese curry (known as “karē”) is milder, thicker, slightly sweet, and almost gravy-like. It’s comfort food in its purest form. The combination of a shatteringly crispy pork cutlet with smooth, aromatic curry sauce over fluffy steamed rice creates a textural contrast that’s hard to beat.
The dish gained massive popularity through Japanese curry house chains like CoCo Ichibanya and Wagamama, which brought it to international audiences. Today, it’s a weeknight dinner favorite for thousands of home cooks who’ve discovered just how simple it is to put together.
Quick Fact: Japanese curry was actually introduced to Japan by the British Navy in the late 1800s, not directly from India. The Japanese adapted it to their own taste, making it sweeter and less spicy than its South Asian origins.
Choosing the Right Cut of Pork
This might sound like a small detail, but the cut of pork you use makes a real difference in how your katsu turns out. You’ve got a few options, and each brings something slightly different to the table.
Pork loin is the most traditional choice. It’s lean, tender, and cuts cleanly into thick slices. Most Japanese restaurants use boneless pork loin chops, about 1.5 to 2 cm thick. The leanness works perfectly here because the panko crust and frying process add plenty of richness — you don’t need extra fat from the meat.
Pork tenderloin is another excellent option. It’s even more tender than loin, though it’s smaller in diameter. If you go with tenderloin, you might need to butterfly it or pound it out to get that wide, flat cutlet shape.
Pork shoulder (sometimes labeled pork butt) is fattier and more flavorful. Some people love it for katsu because the extra fat keeps the meat juicy. But it’s also a trickier cut — you’ll need to trim it well, and the texture isn’t as uniform.
For the best results at home, stick with boneless pork loin chops. They’re widely available, affordable, and forgiving even if you’re new to making katsu.
Pro Tip: Whatever cut you choose, pound it to an even thickness (about 1 cm) before breading. This ensures even cooking and prevents the outside from burning before the inside is done. Place the pork between two sheets of plastic wrap and use a meat mallet or even a heavy rolling pin.
The Perfect Panko Breading Technique
The breading is what separates a good katsu from a great one. Japanese panko breadcrumbs are the star here, and they’re genuinely different from regular breadcrumbs. Panko is made from crustless white bread, processed into light, flaky shards rather than fine crumbs. That’s why panko-breaded dishes get that signature airy, extra-crunchy coating.
Here’s the three-step breading process that you don’t want to skip or shortcut:
Step one: Flour. Season your pork with salt and pepper, then dredge it lightly in all-purpose flour. Shake off the excess. The flour creates a dry surface that helps the egg stick. Without it, your egg wash slides right off.
Step two: Egg wash. Dip the floured pork into beaten eggs. Make sure the entire surface is coated. Some cooks add a splash of water or milk to the eggs to thin them slightly — this creates a more even, less thick coating.
Step three: Panko. Press the pork firmly into a plate of panko breadcrumbs, making sure both sides and the edges are well covered. Don’t be shy about pressing the crumbs in — gentle pressure helps them adhere. Then let the breaded cutlets rest on a wire rack for 10 to 15 minutes before frying. This resting time helps the coating set, so it doesn’t fall off in the oil.
That resting step is one of those small things that most recipes skip but professional cooks always do. It’s the difference between panko that stays put and panko that floats away in your frying oil.
If you enjoy working with breaded Asian dishes, you might also love making crispy potstickers where the wrapper technique matters just as much as the filling.
Frying Your Katsu: Oil, Temperature, and Timing
Deep-frying can feel intimidating if you don’t do it often, but pork katsu is actually one of the most forgiving things to fry at home. The cutlet is thin enough that it cooks quickly, and panko gives you a visual cue — once it’s golden, you’re usually close to done.
Oil choice matters. Use a neutral oil with a high smoke point. Vegetable oil, canola oil, or peanut oil all work well. Avoid olive oil — its flavor competes with the katsu, and its smoke point is too low for this kind of frying.
Temperature is everything. Heat your oil to 170°C (340°F). This is slightly lower than what you might expect for deep-frying, and there’s a reason for that. Pork needs enough time to cook through to the center. If your oil is too hot (say, 190°C), the outside will be dark brown while the inside is still raw. At 170°C, the panko turns golden slowly and evenly while the pork cooks all the way through.
Use a kitchen thermometer if you have one. If you don’t, drop a single panko crumb into the oil — it should sizzle immediately and float to the surface, but it shouldn’t brown within seconds. That gentle, steady sizzle is your sweet spot.
Frying time depends on thickness, but for a cutlet that’s about 1 to 1.5 cm thick, you’re looking at roughly 4 to 5 minutes per side. Don’t crowd the pan — fry one or two cutlets at a time. Overcrowding drops the oil temperature and gives you soggy, greasy katsu instead of crispy perfection.
Once done, drain your katsu on a wire rack (not paper towels — they trap steam and make the bottom soggy). Let it rest for 2 to 3 minutes before slicing. Cut it into thick strips against the grain so it fans out beautifully on the plate.
Did You Know? In Japan, tonkatsu (pork katsu) restaurants often age their panko breadcrumbs for a day before using them. Slightly stale panko absorbs less oil and produces an even crunchier result. You can replicate this by spreading fresh panko on a baking sheet and leaving it uncovered overnight.
Making Japanese Curry Sauce from Scratch
Here’s where things get interesting. Most people — even in Japan — use store-bought curry roux blocks (like S&B Golden Curry or Vermont Curry) for their Japanese curry. And honestly? There’s zero shame in that. Those blocks are designed specifically for this flavor profile, and they produce excellent results in minutes.
But if you want to make your curry sauce completely from scratch, it’s surprisingly doable, and the flavor is noticeably deeper and more personal.
The Roux Base
Japanese curry starts with a roux, just like a French sauce. Melt about 3 tablespoons of butter in a saucepan, then whisk in 3 tablespoons of flour. Cook this over low heat, stirring constantly, for about 8 to 10 minutes. You want it to turn a light brown — darker than a white roux but not as dark as a Cajun roux. This slow cooking removes the raw flour taste and builds a nutty, toasty flavor.
The Spice Blend
Here’s what goes into a good homemade Japanese curry powder: curry powder (the regular S&B type works great), a bit of garam masala, a pinch of cumin, and a touch of turmeric for color. Some cooks add a tiny amount of cocoa powder or instant coffee — sounds odd, but it adds depth and that slightly bittersweet complexity you taste in restaurant-quality Japanese curry.
Stir these spices into your roux and cook for another minute until fragrant.
Building the Sauce
Add chicken stock or dashi (Japanese stock) slowly, about 500ml, whisking constantly to avoid lumps. Then stir in the flavor-builders that make Japanese curry uniquely Japanese: a tablespoon of soy sauce, a tablespoon of honey, a teaspoon of ketchup (yes, ketchup — it adds a tangy sweetness), and a tablespoon of Worcestershire sauce. A grated apple is another traditional addition — it sounds unusual, but it melts into the sauce and adds a natural, fruity sweetness that ties everything together.
Let the sauce simmer for 15 to 20 minutes until it thickens to a gravy-like consistency. It should coat the back of a spoon easily.
If you enjoy building sauces from scratch for Asian dishes, you might appreciate learning about ssam sauce, which follows a similar philosophy of balancing sweet, salty, and savory elements.
Using Store-Bought Curry Blocks
If you’re going the store-bought route, just cook some diced onions, carrots, and potatoes in a pot until softened. Add water (usually about 700ml for one box of roux), bring to a simmer, then break in the curry roux blocks and stir until dissolved. Simmer for 10 more minutes. Done.
The store-bought version is genuinely good. Many home cooks in Japan use it 90% of the time and save the from-scratch method for special occasions.
Vegetables and Sides That Complete the Plate
Pork katsu curry isn’t just about the pork and the sauce. What’s on the rest of the plate matters too.
Steamed Japanese rice is non-negotiable. Use short-grain Japanese rice (like Koshihikari or Calrose). It’s stickier than long-grain varieties, which helps it soak up the curry sauce without falling apart. Rinse your rice thoroughly before cooking — 3 to 4 washes until the water runs mostly clear. This removes excess starch and prevents gummy, clumpy rice. If you’re not sure about storing leftover rice safely, check out this helpful guide on keeping cooked rice in the fridge.
Classic curry vegetables include carrots (diced into large chunks), potatoes (waxy varieties hold up better), and onions (cooked low and slow until they almost dissolve into the sauce). These go directly into the curry sauce while it simmers.
For something fresh on the side, a simple shredded cabbage salad is traditional. Thinly slice green cabbage and serve it raw alongside the katsu. The crunch and freshness balance out the richness of the fried pork and heavy curry. A squeeze of lemon or a light sesame dressing over the cabbage goes a long way.
Pickled vegetables (called “fukujinzuke” or “rakkyo”) are another classic pairing. Their tangy, sharp flavor cuts through the richness perfectly. You can find them in Asian grocery stores, usually in the pickle section.
If you’re building a full Asian-inspired spread, dishes like Korean-style bok choy work beautifully as a green side that doesn’t compete with the katsu’s flavors.
Tips for Making Restaurant-Quality Katsu at Home
Getting that restaurant-level result at home comes down to a handful of details that aren’t complicated but are easy to overlook.
Season every layer. Don’t just season the pork — add a pinch of salt to your flour and a tiny bit to the panko too. This ensures every bite has balanced flavor, not just the meat in the center.
Don’t skip the resting time. After breading, let the cutlets sit for 10 to 15 minutes. After frying, let them rest on a wire rack for 2 to 3 minutes. Both resting periods improve your final result dramatically.
Warm your plates. This sounds fussy, but katsu cools down fast. A warm plate keeps everything at the right temperature longer. Just run your plates under hot water for 30 seconds or stick them in a low oven (100°C) for a few minutes.
Slice with a sharp knife. A dull knife crushes the panko crust and tears the meat. Use the sharpest knife you have, and cut in confident, single strokes — no sawing back and forth.
Make the curry sauce ahead of time. The curry sauce actually improves overnight. The flavors meld together and deepen. Make it the day before, store it in the fridge, and reheat it gently while you fry your katsu. This also makes weeknight cooking much faster.
Pro Tip: If you don’t want to deep-fry, you can make oven-baked katsu. Spray the breaded cutlets generously with cooking oil and bake at 200°C (400°F) for about 20 to 25 minutes, flipping once halfway through. It won’t be quite as crispy as the fried version, but it gets surprisingly close and saves you the hassle of dealing with a pot of hot oil.
Variations Worth Trying
Once you’ve mastered the classic pork katsu curry, there’s a whole world of variations to explore.
Chicken katsu curry is the most common swap. Use boneless, skinless chicken breasts or thighs. Thighs stay juicier, but breasts give you that clean, traditional look. The prep and breading process is identical. If you enjoy chicken in Asian-style sauces, you might also want to try a teriyaki chicken bowl or gochujang chicken — both are weeknight-friendly and packed with flavor.
Tofu katsu works great for vegetarians. Use extra-firm tofu, press it well to remove moisture, slice it thick, and bread it the same way. The trick is getting the tofu dry enough — wet tofu won’t hold the breading.
Curry udon is another popular variation. Instead of rice, serve the curry sauce over thick udon noodles with sliced katsu on top. The chewy noodles with the thick sauce is an incredible combination, especially on cold days.
Spicy katsu curry — add a tablespoon of Chinese chili crisp or gochujang to your curry sauce for a kick. Japanese curry is naturally mild, so even a small addition of heat makes a noticeable difference.
Common Mistakes (And How to Fix Them)
Even experienced cooks run into trouble with pork katsu curry. Here are the issues I see most often and what to do about them.
The panko falls off during frying. This almost always means you skipped one of the three breading steps, didn’t press the panko firmly enough, or didn’t let the breaded cutlets rest before frying. Follow the flour-egg-panko method religiously, and give them that 10-minute rest.
The pork is dry and tough. You’re probably using a cutlet that’s too thin or frying at too high a temperature. Pound your pork to an even 1 to 1.5 cm thickness, and keep your oil at 170°C. Also, don’t overcook — pull it out as soon as it’s golden brown and let residual heat finish the job.
The curry sauce is too thin. If you’re making it from scratch, your roux might not have cooked long enough, or you added too much liquid too quickly. Simmer it longer to reduce, or mix a teaspoon of cornstarch with a tablespoon of cold water and stir it in to thicken.
The curry sauce tastes flat. Japanese curry relies on layers of umami and sweetness. If something feels missing, try adding a splash more soy sauce, a bit of honey, or a small grating of apple. These small additions round out the flavor surprisingly well. Understanding how cooking wines work in Asian cooking can also help you grasp how to build depth in sauces.
Everything is ready at different times. This is the most common frustration. The solution is to make the curry sauce first (even ahead of time), cook the rice next, and fry the katsu last. Katsu has to be served fresh and crispy — it doesn’t wait well. So everything else should be done and ready before the pork hits the oil.
FAQ
Can I use regular breadcrumbs instead of panko?
You can, but the result will be noticeably different. Regular breadcrumbs create a denser, heavier coating that absorbs more oil. Panko is designed to be lighter and crunchier. If panko isn’t available at your local grocery store, check the international or Asian foods aisle — most stores carry it now. You can also order it online.
How do I store leftover pork katsu curry?
Store the curry sauce and the katsu separately. The sauce keeps in the fridge for up to 4 days and actually tastes better reheated. The fried katsu, though, loses its crispiness once refrigerated. If you have leftovers, reheat the katsu in an oven or toaster oven at 180°C for about 8 to 10 minutes to bring back some crunch. Microwaving will make it soggy.
Is Japanese curry very spicy?
Not at all. Japanese curry is one of the mildest curry styles out there. It’s more savory and sweet than spicy. Most store-bought curry blocks come in mild, medium, and hot varieties — but even the “hot” version is tame compared to Thai or Indian curries. Kids in Japan eat it regularly, and it’s considered one of the most family-friendly meals in Japanese cuisine.
Can I air-fry pork katsu?
Yes, and it works reasonably well. Spray the breaded cutlets with cooking oil on both sides, and air-fry at 190°C for about 12 to 14 minutes, flipping once halfway through. The result isn’t identical to deep-frying — you won’t get that same all-over golden crunch — but it’s a solid alternative if you’re avoiding deep-frying.
What’s the best store-bought Japanese curry brand?
S&B Golden Curry and Java Curry are the two most popular brands worldwide. Both are excellent. Golden Curry is slightly sweeter, while Java Curry has a bit more spice complexity. Vermont Curry (by House Foods) is another favorite — it’s the best-selling curry brand in Japan and is known for its apple-and-honey sweetness.
Your Next Dinner Sorted
Pork katsu curry is one of those rare dishes that feels special enough for a weekend dinner but is simple enough for a Tuesday night when you just want something satisfying. Once you’ve made it a couple of times, the whole process becomes almost automatic — pound the pork, bread it, fry it, pour that thick curry over steamed rice, and enjoy something that tastes like it came from your favorite Japanese spot.
Start with the store-bought curry blocks if you’re new to this. There’s no shame in that shortcut — millions of Japanese home cooks use them every week. As you get more comfortable, try the from-scratch curry sauce. Play with the spice levels. Add your own twists. That’s the beauty of this dish — it’s endlessly adaptable while staying fundamentally comforting.
Grab a pork loin, a box of panko, and your favorite curry roux. You already know what to do.